


Can you please email Gina
This week our sponsor is Digital Delights, they will be giving away $10 worth of images to a random commenter, all you need to do is leave a comment it is as easy peasy at that.

")

Welcome to Digital Delights, a magical place filled with my little digi creations from all walks of life. We have a wide range of digital stamps which are delivered straight to your email 24/7!!
Wendy also has her own line of Clear Acrylic stamps at Clear Dollar Stamps.
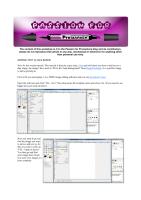
Now for this weeks tutorial. This tutorial is done by yours truly, Gina and will show you how to add text to a digi image, the image I have used is “Elvin the Toad Background” from Digital Delights, it is a perfect image to add a greeting to,
First of all you need gimp, it is a FREE image editing software and you can download it here,
Open the software and click “File - New” then drop down the template menu and chose A4. (If you need to see bigger pics just click on them.)

Now you need to go and find the image you want to edit or add text to, for this you need to click on “File – Open as layers”. You then go and find your image from where you store your images on your computer

You should see something similar to the picture below, but of course with your own image. Now if you print the image as it comes it may be too large and waste too much paper (you know what us crafters are like). So firstly we want to scale the picture down, for this hover over the 4th button down on the left hand side of your toolbox, it should say Scale Tool, click and then click on your image

This is what you should now be seeing, at the bottom of the toolbox you should tick the box “keep aspect” this means you will not lose the shape of your image. Each corner of the image has a square, click and drag the corner to the size you would like the image, don’t forget you have rulers to give sizes on the sides.

Once you have the size you require click on “move tool” which is located on your toolbox 2nd in and 3rd icon down. Now you can move your image anywhere on the page to save space

When you are happy with the location of your image “File – Print”, select your printer and print… be careful to make sure the paper is lined up properly, you will see why later on.

Ok now here you must put down which way your paper has come out of the printer, I just put an arrow with which way it goes back in. Now go colour in your image

I like to zoom in at this point to see my image better, click “View – Zoom – Zoom in” the more you want to zoom the more you do it

Now for the wording, you maybe wondering why I have not done the wording already……..well, I have tried it both ways and when I printed off the wording and then coloured in the image the wording bled and ruined the image, this way the wording goes on top of the colouring and does not bleed at all.
Click on the large black A button which is the “Text tool”

Down the middle of the tool box there is a AA which is all of your fonts, here is where you choose which font you want to use and also the size of font. I used Yearbook solid and the size of text was 85 px,

Move to the area you want to add text and click, there is a little GIMP text editor box that shows itself, click the “use selected font” box so you can see which font you are using and in the text box write the wording you want, you will then see the wording show up in your area on your image, once you are happy close the text box, you don’t need to worry that it is in the correct place, we will sort that out in a few pics :)

Now on this image I have chosen I want a slight slant to the wording so click on the icon above the big black A (text tool), this is the rotate tool,

Click on the text you have just done, making sure you have a dotted line around the text, you should see something similar to below. Now to move the wording to a slant hold down your left button on mouse and move, it is very sensitive but don’t worry about that, once you think you have the correct position click rotate on the box that appeared near your image, if the box is ever in the way just hold your left button down and click on the box to move.

If you are still not happy with the location of the wording use your “Move tool” again which is located in the tool box, click the text you want to move, again make sure you have a small dotted line around the text. Left button down and drag the text to where you want it to go

Just repeat the above instructions for the Birthday and Name

Put your paper with your coloured image back into the printer the correct way up and print again, if you have been careful you should have a perfect match

Here is the finished image, of course I still have some colouring to do.

I do hope I have not bored you to tears, I know it looks very long winded but it really does only take a few minutes to do and with the personalisation of the image I think is really effective.
Don’t forget to leave a comment to win some gorgeous images from Digital Delights, they really do have some stunning images and check out Tuesdays challenge to see my card
Thanks for looking
Hugs Gina xxx


Wow what a fantastic tutorial. Will definately have a go at this. This could be the end of a lot of nightmares for me. Thank you xx Clare x
ReplyDeleteWow What a neat idea, great tutorial.
ReplyDeleteThanks
Suzi
xxx
really cool, thanks for the tutorial. i must check this gimp program out.
ReplyDeleteGreat idear! Thanx for inspiration! Keep up the good work!
ReplyDeletexMarie
Fab tutorial, and no you didn't bore me. Not being very computer literate your instructions were great. Will definitely be having a go at this.
ReplyDeleteHugs Suzi xx
Thanks so much Gina. My older son had got this software from school and he didn't know how to use it properly so this great tutorial will really help both me and my son :) thanks again xxx
ReplyDeletesound like a great idea x
ReplyDeleteFab tutorial, but have to say not all printers load the same way ours you have to put print side down and the old one we had you put print side up but bottom first so hope everyone checks theres . Love the tutorial though thanks for sharing Julye
ReplyDeletefabulous job adding the text
ReplyDeleteGreat tutorial Gina
ReplyDeleteThank you for the hard work
Love Sarah XXX
Gtreat tutorial. Thanks for the inspiration.
ReplyDeleteSmiles
Clare
x
Thanx for a greaty tutorial and a chance to win! :)
ReplyDeleteFab tutorial, will give this a go instead of my old mask printing method. Also, thanks for the link to freebie software. x
ReplyDeleteGreat tutorial. I'm looking forward to playing around with that one!
ReplyDeleteFabulous tutorial, off to find images I can add text to. Thank you Debs x
ReplyDeletemmmm! I will give it a go but I bet mine won't look as good as yours. Many thanks for a great tutorial
ReplyDeleteMaree
FAB TUTORIAL IM SO GLAD YOU SHOWED THIS ITS A GREAT IDEA FOR OUR PROJECTS AND A MASSIVE THANKYOU FOR THE PRIZE I WON FOR LAST WEEKS IM SO HAPPY LOOKING FORWARD TO WHAT I RECIEVE XX
ReplyDeleteI am finding these tutorials very useful, Thanks.xxx
ReplyDeletewhat a fantastic tutorial for those who are not very good with their puters. Well done.
ReplyDeleteHugs
Anj
xx
Oh, this is simply fabulous. Never thought of doing this. Thanks so much for sharing. This will be very useful.
ReplyDeleteHugs.
Norma
What a great tutorial. I think it's really good to have the instructions step by step. I'll definitely be giving this a go ! Sue C x
ReplyDeleteBrilliant tutorial, so easy to follow and such a helpful task too! Thank you very much for sharing!
ReplyDeletehugs
Michelle
x
Great tutorial I am just getting into using digital stamps so this is really useful.
ReplyDeleteThanks
Jayne
XX
Many thanks for the tutorial, it's downloading as I type, looking forward to following your steps. Thank you so much.
ReplyDeleteAnother fabulous idea and great tutorial - thank you.
ReplyDeleteLove, Andrea xx
Great tutorial!
ReplyDeletefab tut Gina,
ReplyDeletefor all my computer literacy, I just haven't got a clue when it comes to graphics programs, but this is brilliant, even I get it
Debz
x
Oh Wow! What a fantastic tutorial. Thanks for the clear instructions. Brilliant.
ReplyDeleteMarion