Passion for Promarkers Copyright Notice

The design work, text, photographs and videos on this site belong to ©Passion for Promarkers and each individual designer that contributes to this site. This information is shared to inspire you. All content on this site is not to be used for commercial purposes without explicit permission.
Please do not reproduce these articles in any way, mechanical or electronic for anything other than personal use only. But you may hyperlink to any of the articles giving due credit
Thank you!

Important

Weekend Workshops are published every Friday and all are available in PDF format so you can print out and keep them.

All workshops can be downloaded by clicking the small icon at the end of each post.


..........
Showing posts with label flowers. Show all posts

Friday, 13 November 2009

Weekend Workshop #24

Hi there and welcome to our 24th Weekend Workshop - hope this Friday the 13th is lucky for you, personally I'd rather just stay in bed, I'm ridiculously superstitious about things like that.

We're so glad that you're all enjoying Ida's sketch for this week's challenge, and we love seeing all your fabulous creations. Remember, there's still plenty of time to enter before 9am on Tuesday - and you can use any colours of promarkers.

This week we have a very special guest joining us to share how she makes the most gorgeous flowers, please welcome Torill


 Hello everyone!


I’m Torill Fossum Stamnes (http://www.screppa.blogspot.com), and I live in Norway. I love my ProMarkers, but I don’t use them much for colouring my images. I play and draw with them. 
First of all, I want to thank Hanne (http://hanneskreativeverden.blogspot.com/) who has taught me how I could play with the markers.  Take a look at her blog, and see her playing as well.
Now I want to show you how you can make your own flowers with your ProMarkers. It’s not that difficult, but if you are like me (?) the flowers are getting prettier with practice.
I’ll do this step by step, and I hope you will understand my explanations.

Picture 1


For this you need ProMarkers, (I have used canary, saffron, rose pink and maroon for this flower), black pen, white pen, scissor, something round to make the shape, paper for ProMarkers, and a pencil.


Picture 2 (steps 1-6)
1.       1. Draw a circle around the shape with the pencil.
2.       2. Find the centre, and make a yellow circle with the Canary (this is the middle of the flower)
3.       3. Take the Saffron and draw a circle on the Canary
4.       4. Blend this together with Canary
5.       5. Make some dots with Saffron on the canary-circle.
6.       6. Take the Rose Pink and make one petal out of the circle, up to the shape and down again. Fill it up with Rose Pink


Picture 3 (steps 7-10)
1.      7.  Take the darker color and draw some lines at the left on the petal. One-two long lines, and some shorter to . the middle.
2.       8. Blend this with the light color, until the lines are gone. Now you have a darker area, and an area that is lighter.
3.       9. Make another petal, make some darker lines
4.       10. blend
Do  repeat steps 6-8 until you have completed the flower. 


Picture 4 (steps 11-14)
1.       11. Take the black pen, and draw around the yellow center and the dots.
2.       12. Draw around the petal, but stop when you come to the place where the next petal appears.
3.       13. Draw around every petal like this
4.       14. Make some black lines in the center of the flower, and make one line for the pollen on each petal

   
Picture 5 (steps 15-16)
1.       15. Take the white pen, and make white pollen dots and a line on the light side of the petal.
2.       16. Cut out the flower – you are now done.


If you like to make flowers in different sizes, you just draw smaller/bigger circles in step 1.
Have fun!!!
Here are some cards and LO I have made with this technique.


 Thank you so much Torill, for a fabulous tutorial, and I can't wait to see these flowers popping up on blogs.


Coming up next week: Our last tutorial this year, which is an image tutorial from Maria
 
Hugs
Gina, Denise and the DT xx
 

Friday, 16 October 2009

Weekend Workshop #20

Hi there, and welcome to our 20th Weekend Workshop - yes its still Debbi here I'm afraid lol
Every week we are more and more overwhelmed with the challenge entries, and we hope that our tutorials, hints and tips are proving useful. The current challenge is a cracker (not literally) and we're looking forward to even more of you entering as you can use any colour of Promarker - please remember though that you do need to use at least 1 Promarker plus the fabulous sketch from Gina to be eligible for the prize. So get crafting, you still have until this Tuesday at 9am to enter.
Gina would also like to thank all of you who have sent her get well wishes - she really appreciates it, you might also want to pop over and enter her super birthday and blogaversary candy. I'll let you into a wee secret, she's gonna be 40 on the 22nd of October. Haha, I'm so going to get my backside kicked for that lol And talking of birthdays, today is Michele's birthday - pop over and send her some birthday wishes.

Anyway, moving swiftly on.... Caryn has done this fantabulous flower tutorial for us all, and its so easy - but so effective.

Spikey flower tutorial by Caryn

I have been asked by a few people how to make the spikey flower that I had on my card for the “Cool Aqua and Apricot” challenge.  I have tried to show it as well as I can but it was at night when I took the photos so please excuse the poor light!! 
You start by cutting a strip of paper into an elongated triangle (remember isosceles from school??).  The size of the strip will determine how big your flower will be.  Go by the width of the “fat” end – what ever length this is your finished flower will be just under double this. Next you need to cut along the entire length of the strip so that you end up with a fringed edge.  Be careful not to cut all the way through but just up to the edge. 
 Picture 1 Picture 2
For the next bit you need a simple quilling tool (like a double-pointed pin – but not sharp!!)
Slide the thin end of the strip into the quilling tool and start rolling it up.
Picture 3 Picture 4
If you are using single-sided paper, then make sure the patterned/coloured side is on the inside of the roll.  Like-wise if you’re using double-sided then the side you want the flower to be should be on the inside of the roll.
Picture 5 Picture 7
At this point you will need to make any little adjustments but DON’T LET GO!!!  Carefully remove it from the quilling tool and add a small dot of glue to the loose end to hold it in place.  Finally, carefully bend the “petals” back from the outside working in.  Lay the flower down on the table and press firmly on the centre to flatten it as much as possible.  Add a dot of glue to the bottom and then it’s ready to go on your card!
Picture 6 Picture 8
Ok, that’s it!  Hope someone out there finds this of use – I’ll be scouring blogland now looking for examples!! 
Take care,
Hugs,
Caryn xxx


I don't know about you, but I can see these flowers popping up on loads of my cards now.
Remember all our tutorials are available in PDF format so you can print them out and keep them. Just email me (Debbi) and let me know which one(s) you would like.
coming up NEXT WEEK – We have an animal image tutorial for you

Hugs Gina, Denise and the DT xxx

Tuesday, 8 September 2009

Weekend workshop #12

Another weekend approach’s, how quickly they come round but it gives us all a chance to catch up on our blogging and hopefully get a bit of crafting in too :) This week Helen has done a watermark tutorial for us, again it does not have nothing to do with PM’s but it is a question we get asked quite a lot, the other tutorial this week is another gorgeous flower tutorial from Michele, both will be available on PDF in a couple of days….and yes I am still behind :( sorry about that.
******************
Watermark Tutorial by Helen
We’ve had a few questions about creating your own watermark/signature so I thought I’d show you how I do it.
For this I use a program called gimp which is available free from here http://www.gimp.org/
This is how I use it
clip_image002
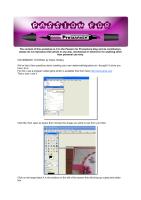
Click file, then open as layers then choose the image you want to use from your files
clip_image004
Click on the large black A in the toolbox on the left of the screen this will bring up a gimp text editor box
clip_image006
Move the mouse curser over the image and click and drag out a box the size you want the text to be then type your text into the
Gimp text editor box. then click on the close button.
On the left hand side tool bar use the text tools to choose the font and font size you want and the colour you want your text to be. I use white as it is neutral
But that’s just my preference.
clip_image008
On the right hand tool bar as shown above drag the opacity bar to the left and this will fade out the text on your image play around until you get the level you like.
Once you are happy with this click on SAVEAS as you would usually, then this box should open
clip_image010
Click on Export then this box should open
clip_image012

Click Save.
And there you have your finished signature/watermark.
Hope this is helpful
Hugs Helen x
******************
Flower #2 Tutorial by Michele
Hi there me again with another flower tutorial for you.
Here is a list of the items that I've used to make up this flower.
image
Sizzix Flower Layers Die or any 5 petal shaped die/punch will do
1 large bead
Apricot ProMarker pen (again any colour will do)

For this particular flower I've cut out the 3 smallest flower shapes twice
image
On the back of each flower, roughly draw a circle in the centre
image
For each flower cut down the sides of each petal until you reach the circle you drew earlier (pic 1, pic 2, pic 3)
Now keep cutting down each petal until they resemble pictures 4, 5 and 6
image
Now on the right side of your flowers, draw a line starting from the centre outwards with your ProMarker pen on each of the tiny petals.
image
Now on the wrong side of each flower, start embossing each petal until they resemble the pictures 1, 2 and 3.
image
Now on the right side of each flower, emboss the centre till it resembles the picture to the left.
image
Pop on the back of 5 flowers some PVA glue and then start layering them up. To finish the flower off, put some PVA glue in the centre and place the bead in.
image
This is what the flower should look like in the end. For a bit of sparkle, I've used spray adhesive and Making Memories Scrapbook Shimmer Spotlight.
dscf6770
And this is what it will look like on your card.
I hope you've enjoyed this tutorial and I look forward to seeing your creations.
Hugs Michele x
****************


Well that is it again for this weeks Weekend workshop, hope you are still enjoying them, please feel free to leave any comments or ideas for future tutorials of what you would like to see :)

Hugs Gina, Denise and Design Team xxx

Weekend workshop #9

Hello again, wow thank you so much for the cards for this weeks challenge of “Pastel Pink & Cool Aqua + Maria’s sketch” they are all so beautiful, and everyone’s colouring is improving by the week. We also have newcomers to PM’s too, it is great to see everyone still so excited about the markers, and if you think you have missed anything, fear not, we have all the prior tutorials on PDF files just pop me an email here and I will get them to you asap. If you have already sent me an email and not had a response please email again as the PDF tutorials have been so popular and I must admit I have been overwhelmed with emails :)
Ok this week we only have one tutorial but it is an amazing one. If you have seen Michele’s cards you will have noticed her beautiful flowers, well she did not buy them like that, she made them and even better she is going to show us all how to do it :)
************
Michele’s Flower Tutorial
I have had lots of requests to show how I make my flowers, so here’s how I do it. For the roses I first got the idea off this blog, and this is my version.
These are the die cuts and flower punch that I use most of the time when I make these flowers.
You will also need white scrap cardstock and plain white photocopier paper for the roses.
image
image image
image
image
image
image
image
image
image
image
image
image
image
image
image
image
image
image
image
image
image
image
image
image
image
image
image
image
image
image
image
image
image
dscf6677
And here's the final result. Hope you enjoyed this tutorial and watch this space, as I've a few more up my sleeve.
************
 

Well that is it for this week, if you have any questions or ideas which you would like the DT to put into tutorials for you, just email us, we are always happy to hear from you all.
By the way we were a little late announcing the Top 5 Passionista from Week 9, so check out the previous post to see if you are one of the lucky 5!
Hugs Gina, Denise and the DT xxx