Congratulations Maree, please can you email Debbi as soon as possible to arrange your prize from Pollycraft.
So, on with this week's treats, our generous sponsor this week is Digistamp Boutique and all you need to do to win some gorgeous digital stamps is... leave a comment - yes, it's that simple.
And the other treat this week is a fabulous tutorial from Maria, who has focussed on adding pattern to a coloured image, so, over to Maria....
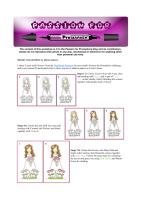
I chose 'Lizzie with Flowers' from the DigiStamp Boutique for next week's Passion for Promarkers challenge, and in my tutorial I'd particularly like to show you how I added a pattern to Lizzie's dress.
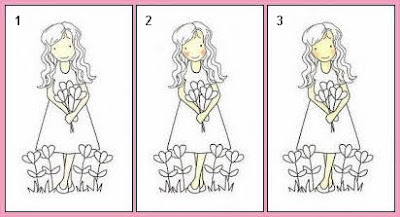
Steps 1-3. Colour Lizzie's skin with Ivory, then add shading with Blush, and a spot of Pastel Pink on her cheeks, finally blending the colours together with another layer of Ivory.

Steps 4-6. Colour her hair with Tan, then add shading with Caramel and Walnut, and blend together with Caramel.

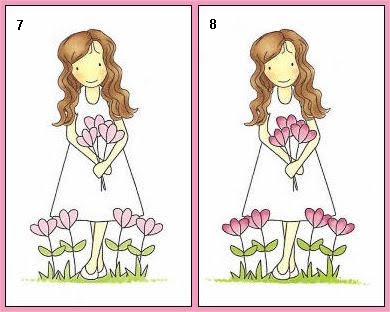
Steps 7-8. Colour the flowers with Baby Pink and shade with Carmine, then blend the colours together with Baby Pink. Follow the same steps for colouring the leaves and grass, but using Leaf Green, and Marsh Green for shading.

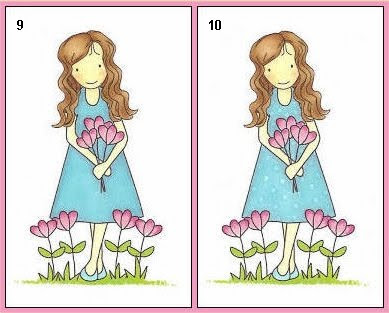
Steps 9-10. Colour Lizzie's dress with Duck Egg, and add shading with Denim. To add the polka dots, hold your Blender pen vertically and touch the very tip of your nib wherever you would like to place a spot. The Blender will have lifted some of the colour from the dress, and will leave you with a dotty pattern!

I hope you have enjoyed my tutorial this week, and thank you very much, Sally-Ann, for the gorgeous image, which I've enjoyed working with very much.
Maria xx


What a great tutorial! I just love the dots and the simpel way to make them! I sure will try that! Thank you!
ReplyDeleteHave a nice weekend everyone!
I've had a blender for yonks & have never used it...will now...great tutorial...thank you X
ReplyDeleteA lovely tutorial, I hadn't thought of using the blender pen for that! Thanks! x
ReplyDeleteWhat a great tut. so clear and easy to understand. It will be lots of fun to see your coming card.
ReplyDeletexMarie
great tutorial, the flowers and spotty dress look fab x
ReplyDeleteAh now that is clever. Brilliant tut and adoring those dots. Fierce clever!
ReplyDeleteJenny T.
Great tutorial! Love how the hair looks!
ReplyDeleteWow! What a simple way to add a pattern to clothing - must remember that! Thanks for sharing your other tips too.
ReplyDeleteLove, Andrea xx
love the tutorial...i may stop scowling at my blender now and actually use it...lol...Debs x
ReplyDeleteWow what a fab tutorial, I don't have a blender pen, think I'd better get one ;-)
ReplyDeleteWow! I will have to try this out with my blender pen. Thanks.
ReplyDeleteMaree.
so that is what you do with a blender pen then!! great tutorial, fab hair colouring too. X
ReplyDeleteGreat tutorial. Thanks for the tips. x
ReplyDeleteO wow thanks, I'm really glad I hopped over today.. I've got a blender and hardly used it. Love the dotted dress... will definitely try it out. Thanks again. Hugs xxx
ReplyDeleteAnother fabulous tutorial and love the digi image. What a neat way to use the blender pen. Thanks for sharing.
ReplyDeleteMarion
Thanks for the tutorial. Very helpful and clear.
ReplyDeletelovely tut im goign to try an get that stamp now so i can try it..thankyou!
ReplyDeleteWhat a clever idea, will definitely give this a try. Thanks Debs xx
ReplyDeleteI had often wondered how peeps got dots on things without paper piecing - now i know!! Adding blender pen to shopping list !! Thanks for the great tutorial, love jacky xx
ReplyDeletesuper cute image and thanks for the tutorial its a really helpful one xx
ReplyDeleteGreat tutorial and what a simple idea for adding pattern, will definately be trying this. Thanks.
ReplyDeleteLtnn x
great tutorial hun...think thats gonna be used lots ..when I can find my blender lol
ReplyDeletehugs shell xx
Lovely colouring;-))m
ReplyDeleteI can't believe how much I have learnt in the short time I have been following this blog, thank you so much!
ReplyDelete