Thanks for all of the entries for this weeks challenge, you still have plenty of time to join in the challenge closes at 9am on Tuesday morning.
This week Ida has done a great tutorial on the Forever friends bear, I am sure you will love it.
******************
Forever Friends Tutorial – Ida
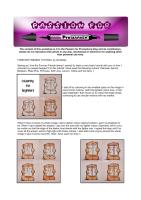
Seeing as I love the Forever Friends stamp I wanted to share a very basic tutorial with you on how I coloured my newest bargain! For this tutorial I have used the following colours: Oatmeal, Apricot, Blossom, Rose Pink, Primrose, Soft Lime, Lemon, Yellow and Ice Grey 1.  I start of by colouring in the smallest spots on the image in round circle motions. (with the lightest colour tone, in this case Oatmeal) I then move on to colour the larger areas, continuing to use circular motions with my marker.
  When I have covered my whole image I add a darker colour (Apricot) where I want my shadows to be. When I have added the shadow, I go over the area with my lighter colour (Oatmeal), still in circular motion so that the edge of the darker tone blends with the lighter one. I repeat this step until I've cover all the areas I want to high light with these colours. I also add a line of grey around the whole image to give it some more life. Here I have used Ice Grey 1.
  I use the same steps to colour the gift box, using one light colour and one darker, in this case - Blossom & Rose Pink for the bow, Primrose & Soft Lime for the box and Lemon & Yellow for the tag.
  Thanks for looking, I hope this this was some how helpful! :)
 I start of by colouring in the smallest spots on the image in round circle motions. (with the lightest colour tone, in this case Oatmeal) I then move on to colour the larger areas, continuing to use circular motions with my marker.
  When I have covered my whole image I add a darker colour (Apricot) where I want my shadows to be. When I have added the shadow, I go over the area with my lighter colour (Oatmeal), still in circular motion so that the edge of the darker tone blends with the lighter one. I repeat this step until I've cover all the areas I want to high light with these colours. I also add a line of grey around the whole image to give it some more life. Here I have used Ice Grey 1.
  I use the same steps to colour the gift box, using one light colour and one darker, in this case - Blossom & Rose Pink for the bow, Primrose & Soft Lime for the box and Lemon & Yellow for the tag.
  Thanks for looking, I hope this this was some how helpful! :)
 ******************

coming up NEXT WEEK – We have another great tutorial this time from Sue,
Hugs Gina, Denise and the DT xxx


No comments:
Post a Comment