


Over to Ida...
Welcome to this weeks WEEKEND WORKSHOP. I will be showing you how I have coloured my image for my design team card - week 25.
*click on the pictures for a larger view*
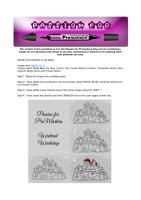
Image used: byEVY nr 13.
Colours used: Pastel Blue, Ice Grey 1 and 2, Tan, Cocca, Walnut, Crimson,Terracotta, Apricot, Honeycomb, Bright Green and Forrest Green.
Step 1: Stamp the image onto cartridge paper
Step 2: I have added some shadows to the snow family using PASTEL BLUE, using line strokes and not circular motions.
Step 3: I have added a grey shadow around the whole image using ICE GREY 1.
Step 4: I have colured the parents hats with CRIMSON red on the outer edges of their hats.

Step 5: I have gone over the whole area of the hat one more time using CRIMSOM and added shadows with TERRACOTTA.
Step 6: I then add BRIGHT GREEN to the scarf's where I want the shadows to appear.
Step 7: I then add FORREST GREEN as a shadow colour in the outlined areas I coloured with BRIGHT GREEN in the previous photo.
Step 8: I have added the outlined areas of the kids's scaft's using CRIMSON.
Step 9: I blended the scarf with another layer of CRIMSON.
Step 10: And then I TERRACOTTA to make the shadows and add a layer of HONEYCOMB to all the noses on the upper side of the noses.

Step 11: I colour in the outer edges of the sign with WALNUT and add a layer of APRICOT underneat the layer of HONEYCOMB coloured in the last step.
Step 12: WOOOPS this one slipped in between.
Step 13: I then coloured a bit closer to the middle covering the outer edges with COCCA
Step 14: Then I blended both layers of brown with TAN, colouring the whole area.
Step 15: I wanted a bit darker shadow under the image so I coloured a stripe with ICE GREY 2 to give it a bit more depth.
Step 16: I also wanted a bit more shadow on the snowmen so I went over all the inner shadows of them with PASTEL BLUE, aslo adding a shadow I forgot in step 2 (above the sign on the snowmama) And finally I add some white highlights on various places of the image.

And here's my finished result ready glue on to my card:

Thanks for looking and have fun colouring!!
Ida
Well I'm certainly looking forward to seeing Ida's completed card when the new challenge starts on Tuesday.
We hope you find the tutorials helpful and would love to see how you get on. As always, all the workshops are available in PDF format so you can print and keep them, just email me.
Coming up next week: A tutorial from our guest Torrill
Hugs
Gina, Denise and the DT xx


Thanks for the colouring of the snow family, I'm sure this will be really useful in the next few weeks!!
ReplyDeleteLove the image, its so cute,
hugs Angela x