Sarah has done this week's workshop for you and there's a wee clue as to the theme for next week's challenge here. But you don't need to worry about that too much until Tuesday as the current challenge doesn't finish til 9am on Tuesday 2nd Feb. As always, we've been bowled over with the fabulous entries - you all seem to love the Pastel Green and Blossom colour combo as much as we did. So if you haven't entered yet, give it a try.
So, we'll leave you in Sarah's capable hands now...
Colouring Animals Tutorial for Passion for Promarkers by Sarah Horne
Materials required:
· Bleed resistant cardstock – I use Stampin Up Whisper white cardstock as it is the best I have found so far.
· Black Bleed resistant Ink such as Impress or Memento
· White Ink Essentials pen
· Promarkers – Ice grey 1,3 & 5 & Pastel pink
· Magnolia Elephant & Acrylic block
1. Stamp the image onto the cardstock
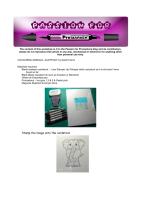
1. For this tutorial I have done the shading first so it is clearer to see, this image in particular has markings that help indicate where the shadows will lie – I have used Ice Grey 5 as my darkest colour as follows:
1. I used Ice Grey 3 next, at this stage I have not blended ~ I have simply just laid down the colour next to the darkest shade.
1. Next I gave the elephant rosy cheeks with the Pastel pink pen
1. Next I used the Ice Grey 1 pen to blend all the colours together, even the rosy cheeks. I went over the darker colours with small circular motions and removed all the harsh lines……..this will lighten your darker colours so you can add some more shadowing using Ice grey 1 to remove harsh lines as before
1. Finally I added some highlights to his cheeks and toes with a white Ink Essentials pen ~ sorry photo not that great for this stage
I hope you enjoyed my tutorial and you were able to take something from it.
Sarah
Thankyou Sarah, isn't that just the cutest elephant ever? So have you figured out what the theme for the next challenge will be? Don't worry, all will be revealed at 9am this Tuesday, although I can tell you that you can use ANY COLOURS of promarkers.
Coming up next week...Sue will be sharing a fabulous tutorial with us.
Hugs,
Gina, Denise & DT x x


Just found this blog thanks to Anita. Will have a go with this idea. Thanks.
ReplyDeleteGreat tutorial - thank you.
ReplyDeletePaula x x x
thanks for all these wonderful tutorials, just a ? in relation to the fab storage unit u guys made for the promarkers, do any of you remember what the DVD unit was called, I've had a look in my Ikea catalogue n online but cant see it anywhere, as our store is a fair drive away dont want to go there if we dont stock it here in Oz, will have to look for something else, lol :0)
ReplyDeleteGinny (my5bratz@live.co.uk)